How to run cron jobs (on a schedule ) using AWS Fargate
In this article, we're going to discuss how to run AWS Fargate task periodically or in a schedule.
Why not use AWS Lambda to run cron job?
You can even use AWS Lambda to run cron job. I've written an article on the same here. But, one of the limitations of AWS Lambda is that the function will get timed-out at 15 minutes. If your cron job needs more time to execute, you may prefer AWS Fargate.
Just like AWS Lambda, AWS Fargate is also serverless - meaning that you don't need to manage the underlying infrastructure and you'll be billed only for the duration that you fargate task is running.
With respect to pricing, there is a bit of difference. Lambda is billed per millisecond whereas AWS Fargate is billed per second with 1-minute minimum.
Note: We'll be using AWS CDK for creating all necessary AWS resources in this article. It's an open-source software development framework that lets you define cloud infrastructure. AWS CDK supports many languages including TypeScript, Python, C#, Java, and others. You can learn more about AWS CDK from a beginner's guide here. We're going to use TypeScript in this article.
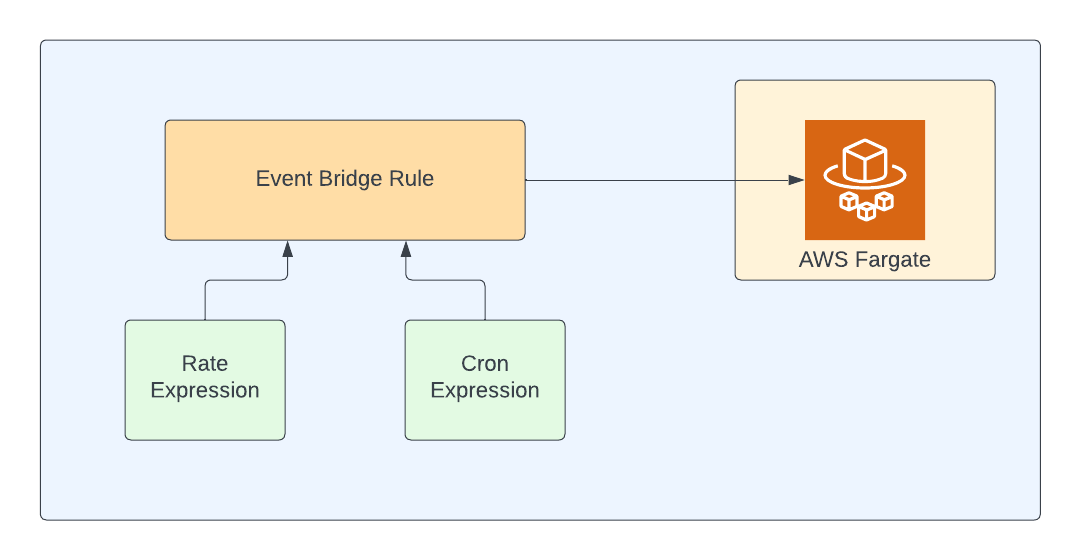
How to Schedule
We're going to use AWS EventBridge rules for scheduling. You can use either rate expression or cron expression
Rate expressions
Rate expressions are a simpler format for representing schedules. The rate expression is a string value that follows the format
rate(value unit)
value should be a positive number whereas the unit can be any of the below values
- minute
- minutes
- hour
- hours
- day
- days
If the value is equal to 1, then the unit must be singular. If the value is greater than 1, the unit must be plural
Examples:
rate(1 minute) : This expression will create a schedule for every minute
rate(10 minutes) : This expression will create a schedule for every 10 minutes
rate(1 hour) : This expression will create a schedule for every hour
rate(10 hours) : This expression will create a schedule for every 10 hours
rate(1 day) : This expression will create a schedule for everyday
rate(10 days) : This expression will create a schedule for every 10 days
Cron expressions
Cron expressions are the most commonly used format in both legacy and modern systems for running background jobs and these cron expressions are being used in UNIX & Linux environments for quite some time.
Cron expression has below fields
minutes: This represents the minutes' value and can be from 0-59
hours: This represents the hours' value and can be from 0-23
day-of-month: This represents the day of the month and can be from 1-31
month: This represents the month of the year, either from 1-12 or from JAN-DEC
day-of-week: This represents the day of the week, either from 1-7 or from SUN-SAT
year: This represents the year
Restriction: We'll not be able to specify the value of day-of-month and day-of-week in the same expression. If you specify the value (or a * in one of these fields, you must specify ? in the other.
If you're using CDK, there are 2 ways to define cron expressions
- string format
- object format
Cron expression in string format:
This is the classical format and this string follows the below format
cron(minutes hours day-of-month month day-of-week year)
We're going to use rate expression for scheduling the cron job. However, you can choose either based on your preference.
Our cron job code
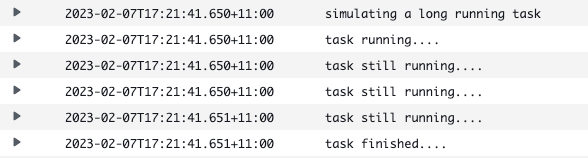
We're going to create a new nodejs project ,the actual code, which needs to be executed on a schedule. We're going to create app.js with bunch of console.log statements simulating some long running job.
console.log('simulating a long running task');
console.log('task running....');
console.log('task still running....');
console.log('task still running....');
console.log('task still running....');
console.log('task finished....');
Dockerfile
The Dockerfile is pretty simple. We're choosing alpine as base image. We just copy the package.json files and install all the dependencies and run the app.js
FROM node:16-alpine

WORKDIR /usr/src/app

COPY package*.json ./
RUN npm install
COPY . .

EXPOSE 80
CMD [ "node", "app.js" ]
Then, you can either push the image manually to ECR repository or build a CI/CD pipeline to push the images. I strongly recommend to use CI/CD pipeline as it is easier to maintain. I've written a detailed guide on how to build a CI/CD pipeline to fargate here . You can read that article if you want to build CI/CD pipeline using Github Actions.
Infrastructure
Fargate task requires VPC and will run inside a VPC. As you may know, a VPC may have different subnets.
Which subnet to use for Fargate task
Your fargate task should be able to communicate with Event Bridge in order for event bridge rule to start your task. As AWS Event Bridge is in public AWS network, you've 3 options for hosting your fargate task
- In public subnet of your VPC
- In private subnet with NAT Gateway
- In private subnet and interact with Event Bridge using Endpoint
There are pros and cons for each of the approach. I've discussed in detail over various ways of connecting to public AWS service such as S3 from private subnet in a VPC here. But the approach remains the same. Below is the short summary.
Placing your fargate task in public subnet is pretty simple and easy but your fargate task will be accessible from public. This can be a big NO from security standpoint for obvious reasons.
You can have fargate task in private subnet with NAT Gateway. The advantage is that you can still access the internet but you've to pay for NAT gateway - which may gets costlier based on your usage/budget.
You can still place your fargate task in private subnet and use Endpoint to talk to EventBridge. I've discussed about using endpoint with S3 here . But the approach remains the same even if you use it with eventbridge.
In this article, we would be using private subnet with NAT Gateway as it is secure and I can connect to internet from my fargate task and no-one from internet can connect to my task.
Let's create VPC using aws-cdk
const vpc = new ec2.Vpc(this, "FargateNodeJsVpc", {
      maxAzs: 2,
      natGateways: 1,
      subnetConfiguration: [
        {
          cidrMask: 24,
          name: "ingress",
          subnetType: ec2.SubnetType.PUBLIC,
        },
        {
          cidrMask: 24,
          name: "application",
          subnetType: ec2.SubnetType.PRIVATE_WITH_EGRESS,
        },
      ],
    });
Then, create a cluster
const cluster = new ecs.Cluster(this, "Cluster", {
      vpc,
      clusterName: "fargate-node-cluster",
    });
We'll be using AWS ECR repository for storing container images. We're referring to that ECR repository (which we created earlier) using below code snippet.
 const repo = ecr.Repository.fromRepositoryName(
      this,
      "FargateNodeJsRepo",
      "fargate-node-app"
    );
We're going to use one of the established patterns for running the scheduled fargate task using AWS CDK. We create scheduled fargate task as shown in below code snippet.
const scheduledFargateTask = new ecsPatterns.ScheduledFargateTask(
      this,
      "ScheduledFargateTask",
      {
        cluster,
        vpc,
        subnetSelection: {
          subnetType: ec2.SubnetType.PRIVATE_WITH_EGRESS,
        },
        scheduledFargateTaskImageOptions: {
          image: ecs.ContainerImage.fromEcrRepository(repo),
          memoryLimitMiB: 512,
          cpu: 256,
        },
        schedule: Schedule.expression("rate(30 minutes)"),
        platformVersion: ecs.FargatePlatformVersion.LATEST,
      }
    );
Testing
You can deploy the stack using cdk deploy command and you can see the logs of your task in Cloudwatch.
Please let me know your thoughts in comments