Step by step guide to use Github OpenID Connect (OIDC) - Don't store AWS access and secret keys in github secrets
Github Actions is a tool to automate your development workflows. Primarily it is being used as a CI/CD tool at many places.
Let us consider a scenario where I want to deploy an application in AWS. To deploy an application, you need to prove your identity and you should have sufficient access to the resources that you need in AWS.
For the sake of simplicity, let us assume that we want to deploy a React SPA (Single Page Application) in an S3 bucket.
Problem with storing keys for long term
Earlier, we used to store the access key and secret key in github secrets.

These keys would be used in github workflow as below.
name: build & deploy react app

on:
  push:
    branches:
      - main

jobs:
  build-react-app:
    runs-on: ubuntu-latest
    steps:
      - name: checkout code
        uses: actions/checkout@v3
      - name: install packages
        run: npm ci
      - name: run tests
        run: CI=true npm run test
      - name: build app
        run: npm run build
      - name: Configure AWS Credentials
        uses: aws-actions/configure-aws-credentials@v1
        with:
          aws-access-key-id: ${{ secrets.AWS_ACCESS_KEY_ID }}
          aws-secret-access-key: ${{ secrets.AWS_SECRET_ACCESS_KEY }}
          aws-region: us-east-1
      - name: Deploy react app
        run: aws s3 sync ./build/ s3://serverless-app-fe-bucket
If you're not familiar with building front-end application, don't worry.
Let me explain. We're checking out the code in the first step as github workflows don't check out your code by default. We're installing the packages in the second step. Then, we run tests in the third step and building the react app in 4th step.
Before deploying this react build into AWS S3, we need to provide github actions our credentials. These credentials would be used by github action to communicate with AWS.
Above workflow will work and it will deploy the application in AWS S3. But there is one security issue with this setup. These access key and secret key is stored in github secrets for long term. If these codes are compromised, there is a possibility of misuse.
Solution: Github Open ID Connect
To prevent this issue, Github has an option to connect to AWS through 'Open ID Connect'. When using Github Open ID connect, you don't need to store access key and secret key for long term. A token will be generated while running the workflow and token will become invalid after the specified session duration. The default session duration is 1 hour.
Below are the steps that you need to do to use Github OpenID connect.
- Login to AWS console and select IAM service. Select 'Identity providers' at the left hand side menu and click on the "Add Provider" button
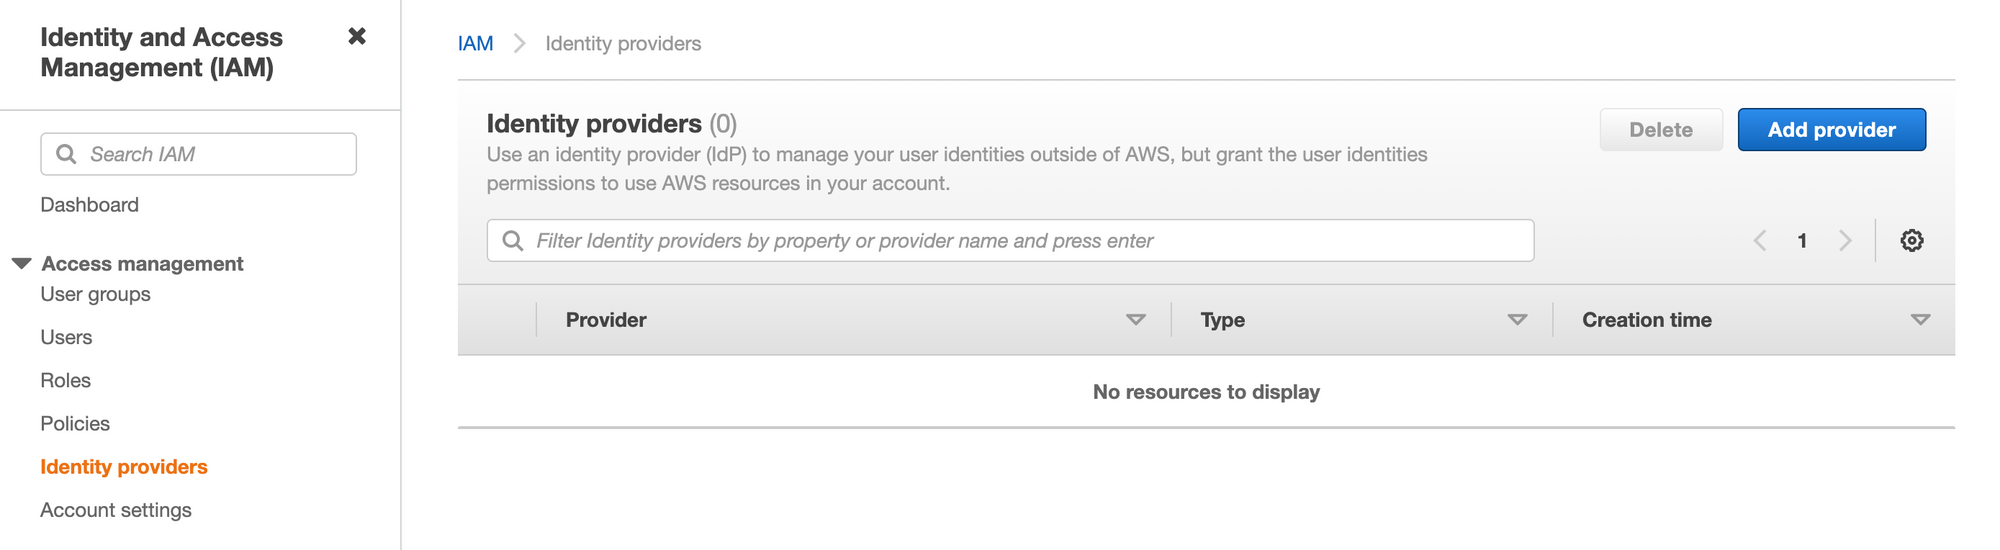
2. Select 'Open ID Connect' option and enter these values.
For the provider URL: enter value https://token.actions.githubusercontent.com As we're going to use official action, so we're using sts.amazonaws.com as the value for the 'Audience' field.

Click "Get thumbprint" button - you'll getting the thumbprint and then you can click "Add Provider" button at the bottom of the screen to add the provider. Please note that without clicking the "Get thumbprint" button, you'll not be able to addd provider.
3. Once we've added the provider, we have to create a new role in IAM.
Select IAM Service in AWS console and select 'Roles' in left hand side menu and click "Create Role' button. You will be able to see below screen.
Select 'Web Identity' option and select the github identity provider from the drop down. And, when you select github identity provider, audience drop down will be auto populated with the value that we've entered while creating identity provider. Select that value ('sts.amazonaws.com')

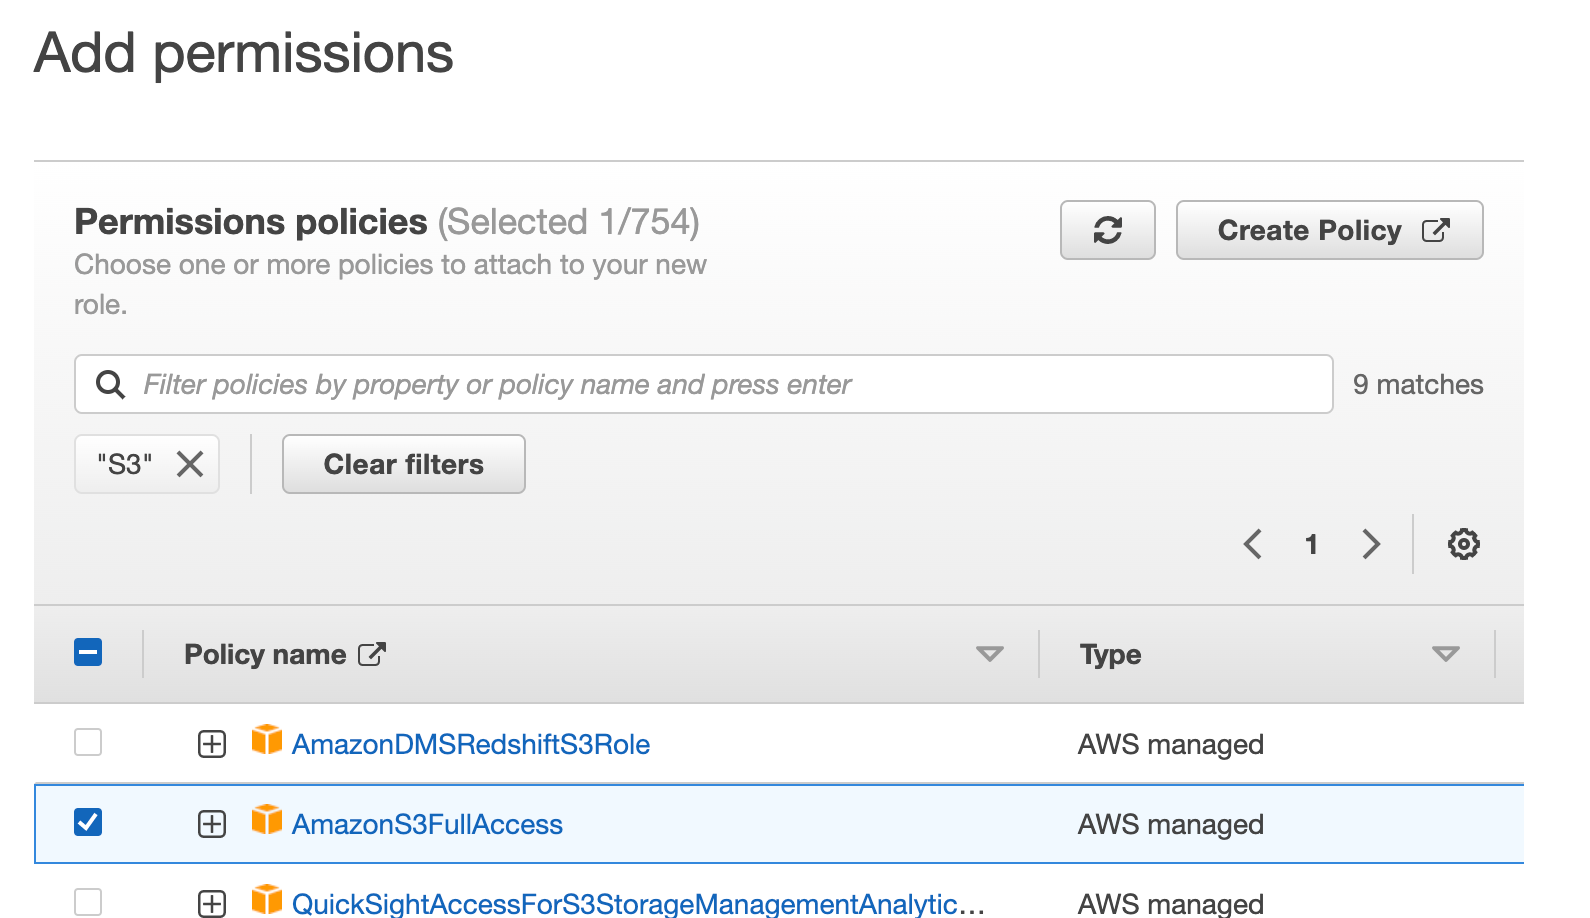
Click Next and select the permissions that you need for this role. As I'm deploying the react application to S3, I'm selecting 'AmazonS3FullAccess'. Choose your permissions which suit your needs.
When you click 'Next', you'll be asked to select trusted entities. It will be auto-populated with below content. I've replaced my actual account number with text 'your-aws-account-number'
{
    "Version": "2012-10-17",
    "Statement": [
        {
            "Effect": "Allow",
            "Action": "sts:AssumeRoleWithWebIdentity",
            "Principal": {
                "Federated": "arn:aws:iam::your-aws-account-number:oidc-provider/token.actions.githubusercontent.com"
            },
            "Condition": {
                "StringEquals": {
                    "token.actions.githubusercontent.com:aud": [
                        "sts.amazonaws.com"
                    ]
                }
            }
        }
    ]
}
The screen will look something like below.
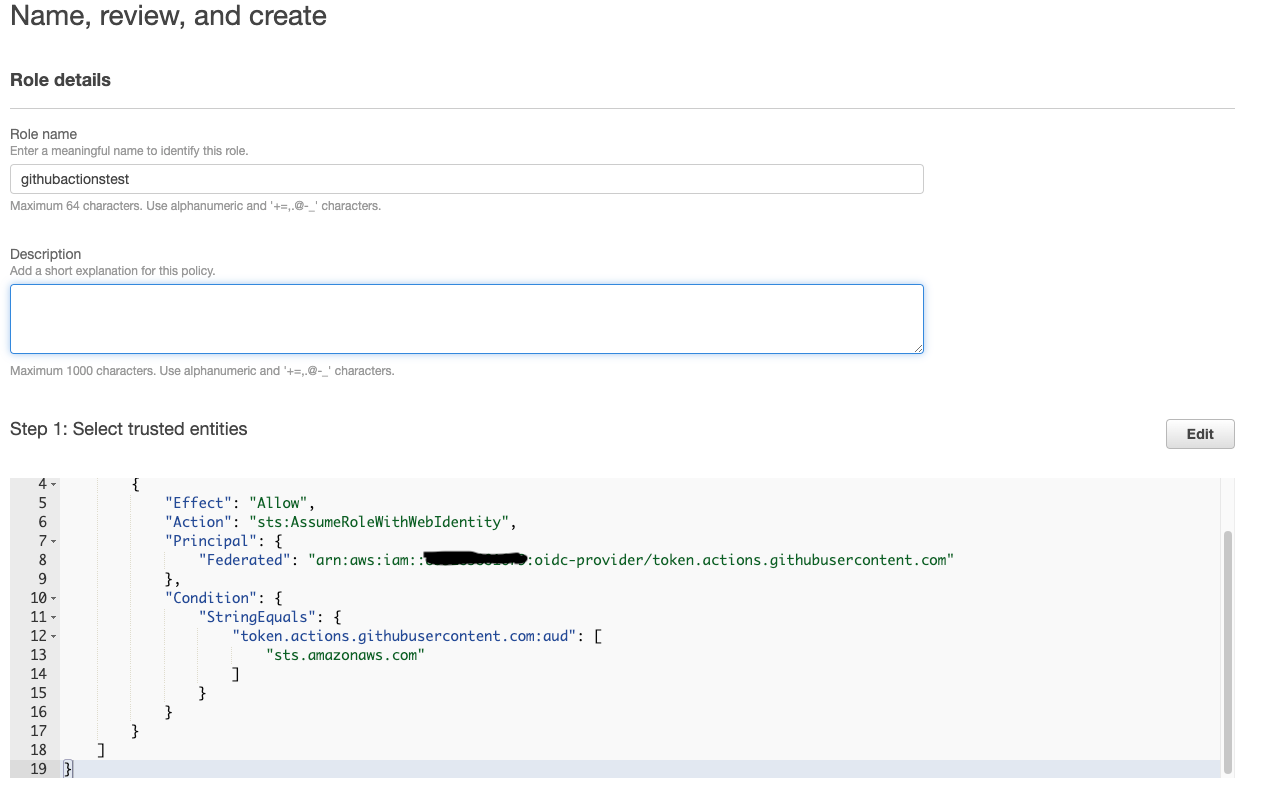
Enter name of the role(I've used githubactionstest) and select "Save role". Role will be created and you can see the same in list of roles.
4. Final step is to harden the security further
Most probably you'll be having multiple github repositories and if you're using github organization - there would be many users as well. I want this token to be used only from a particular repo. To do that, we're going to update condition of trust-policy. As of now, it is allowing the audience of 'sts.amazonaws.com'.
We're going to restrict this role to a particular github repo so that only from that repo we can deploy the resources to AWS. Select the role that you've created in earlier step and update the trust relationships with below content.
{
    "Version": "2012-10-17",
    "Statement": [
        {
            "Effect": "Allow",
            "Principal": {
                "Federated": "arn:aws:iam::your-account-number:oidc-provider/token.actions.githubusercontent.com"
            },
            "Action": "sts:AssumeRoleWithWebIdentity",
            "Condition": {
                "StringLike": {
                    "token.actions.githubusercontent.com:sub": "repo:mugiltsr/react-ci-cd-github-actions:*"
                }
            }
        }
    ]
}
Please note that mugiltsr is my github account id and react-ci-cd-github-actions is the name of the repository.
Once you update the trust policy (as shown above), you can update the step Configure AWS credentials in github workflow as below. You can see that we've removed usage of access key and secret key and it can removed safely from github secrets as well.
- name: Configure AWS Credentials
        uses: aws-actions/configure-aws-credentials@v1
        with:
          role-to-assume: arn:aws:iam::<your-aws-account-number>:role/githubactionstest
          aws-region: us-east-1
Now, no keys are stored in your github repositories. And, you can have complete control over your access from github from aws itself.
References:
