Setting up a CI/CD Pipeline for static website using Gitlab CI CD
In this guide, you're going to learn how to create an infrastructure in AWS to host react application - in fact, the steps would be same for all frameworks which ultimately generate static websites - such as Angular, Vue etc.. Then, we're going to learn about how to set up CI/CD (Continuous Integration / Continuous Deployment) pipeline to integrate and deploy your changes automatically once you check-in the changes in Gitlab repository.
Infrastructure creation:
AWS S3 service has a capability to host static website. So, the infrastructure is pretty simple - it is just a s3 bucket with simple configuration to make the bucket to behave like a website.
For this, we're going to AWS CDK - an Infrastructure as Code (IaC) tool - developed and maintained by AWS. If you're new to AWS CDK - I strongly suggest you to read this guide to understand AWS CDK. No problem, I can wait.
Having understood the basics of AWS CDK - let us create AWS CDK app using typescript. First, create a new directory. AWS CDK CLI requires to have an empty directory for it to create CDK app. Then, you can execute the command cdk init app to create a new CDK app.
mkdir aws-cdk-static-website
cd aws-cdk-static-website
cdk init app --language=typescript
CDK app would have created an empty stack - with an example resource for the queue. Now, we're going to create a bucket in that stack
 const wesbiteBucket = new s3.Bucket(this, "WebsiteBucket", {
      bucketName: "react-app-static-website-bucket",
      publicReadAccess: true,
      websiteIndexDocument: "index.html",
    });
In the above Bucket construct, we're passing 3 parameters:
bucketName - as the name implies, this would be the name of the bucket created
publicReadAccess - to host a website in S3 bucket - the bucket should've public read access
websiteIndexDocument - When you access the dynamically generated domain - this contents of the file mentioned here would be displayed. As of now, we want index.html to be displayed when users access the website.
Please note that we've not created this index.html till now. Ultimately, this index.html would be generated by building react application. Our infrastructure setup doesn't care whether it is a react app or angular app. All it needs is a HTML file by name index.html .
So, we're going to create a simple bare-bone html file and we're going to deploy that HTML file when we deploy this CDK app.
Create a directory by name website at root level of the CDK app and create a simple HTML file by name index.html . As mentioned earlier, the contents of the file doesn't matter.
Then, we're doing to deploy the contents of website directory(just index.html in our case) into the bucket created earlier.
new s3deploy.BucketDeployment(this, "BucketDeployment", {
      sources: [s3deploy.Source.asset("./website/")],
      destinationBucket: wesbiteBucket,
    });
This BucketDeployment construct needs couple of parameters - sources to indicate the contents that have to uploaded into bucket and destinationBucket represents the target bucket (website bucket in our case)
Below is the complete contents of the stack
import { Stack, StackProps } from "aws-cdk-lib";
import { Construct } from "constructs";
import * as s3 from "aws-cdk-lib/aws-s3";
import * as s3deploy from "aws-cdk-lib/aws-s3-deployment";


export class AwsCdkStaticWebsiteStack extends Stack {
  constructor(scope: Construct, id: string, props?: StackProps) {
    super(scope, id, props);

    const wesbiteBucket = new s3.Bucket(this, "WebsiteBucket", {
      bucketName: "react-app-static-website-bucket",
      publicReadAccess: true,
      websiteIndexDocument: "index.html",
    });

    new s3deploy.BucketDeployment(this, "BucketDeployment", {
      sources: [s3deploy.Source.asset("./website/")],
      destinationBucket: wesbiteBucket,
    });
  }
}
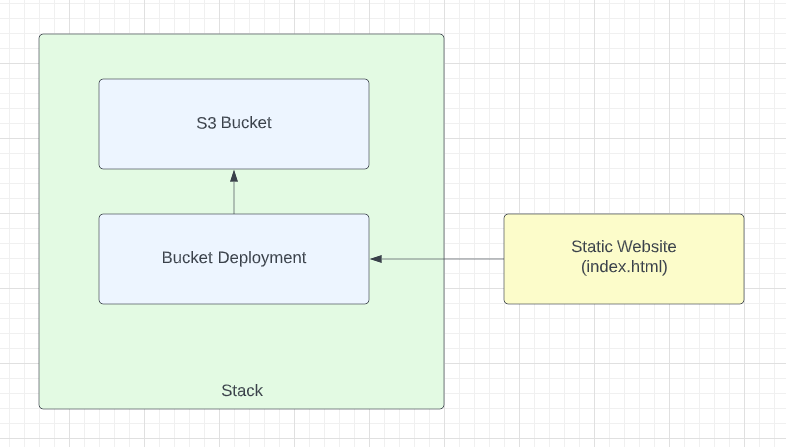
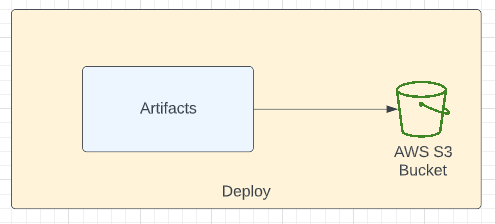
Below is the pictorial representation of our infrastructure created using AWS CDK
I hope you've already bootstrapped CDK app - as explained in this article. If not, please execute below command
cdk bootstrap
Execute the below command to deploy the CDK app
cdk deploy
CDK app will ask for necessary permissions and roles to be created for it to deploy. Once it is deployed, you'll be notified in terminal. Then, you can log-in to the AWS console to see the changes.
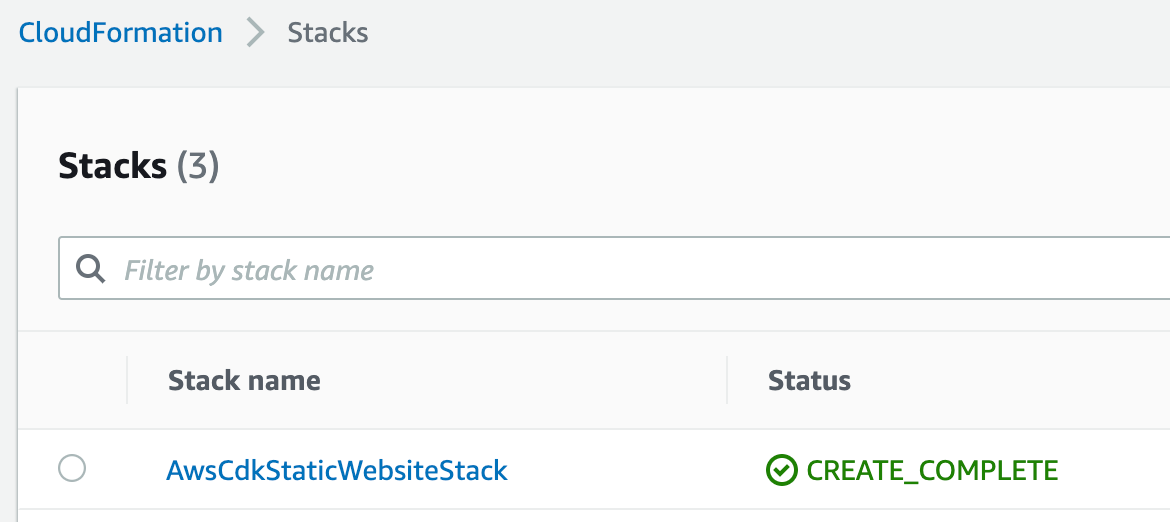
Below is the screenshot of CloudFormation stack that has been created by CDK app
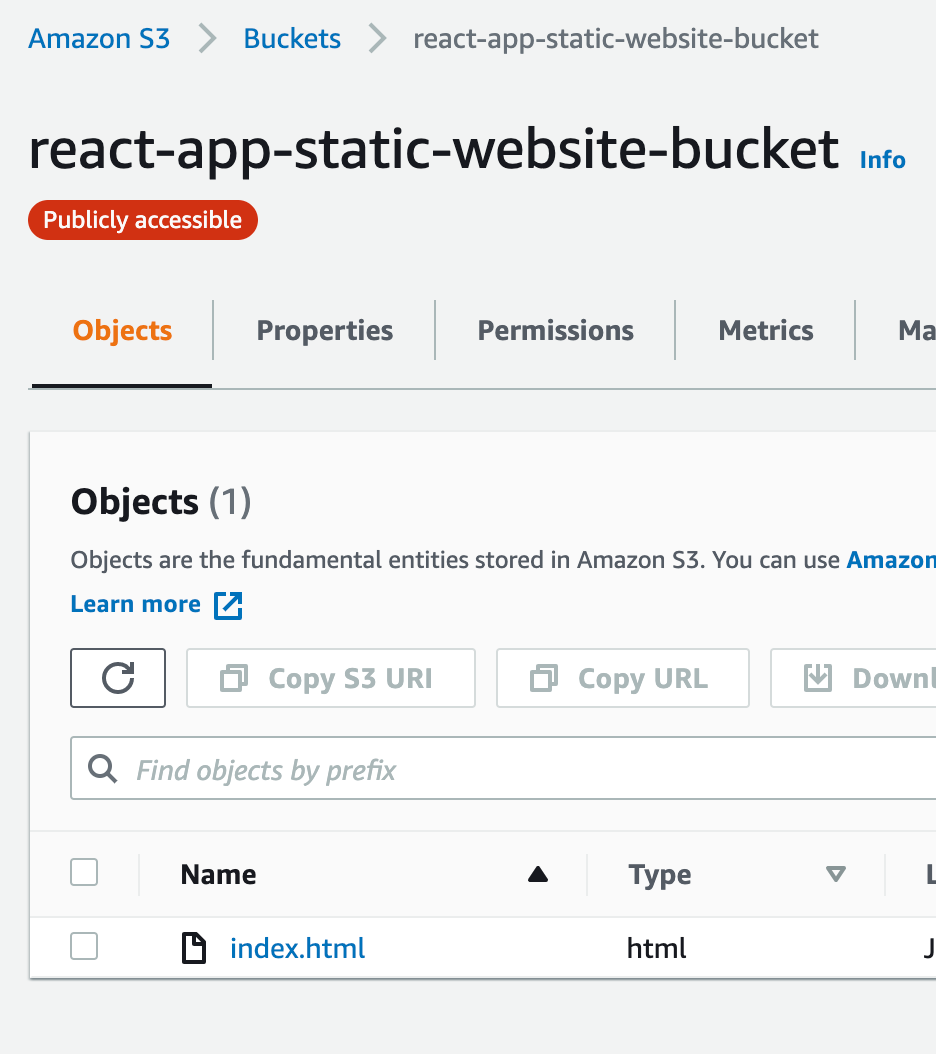
When you visit, you could see the Publicly accessible bucket as shown below
CI/CD pipeline with Gitlab:
We're going to create a simple react app and then we're going to write CI/CD pipeline. If you're not familiar with Gitlab CI CD, I strongly recommend you to read this guide on CI CD using Gitlab.
Execute below command to create react app (I'm using TypeScript). The name of the react app is gitlab-react-app and using npm as package manager. Of course, you can use yarn if you're more familiar with it.
npx create-react-app gitlab-react-app --template typescript --use-npm
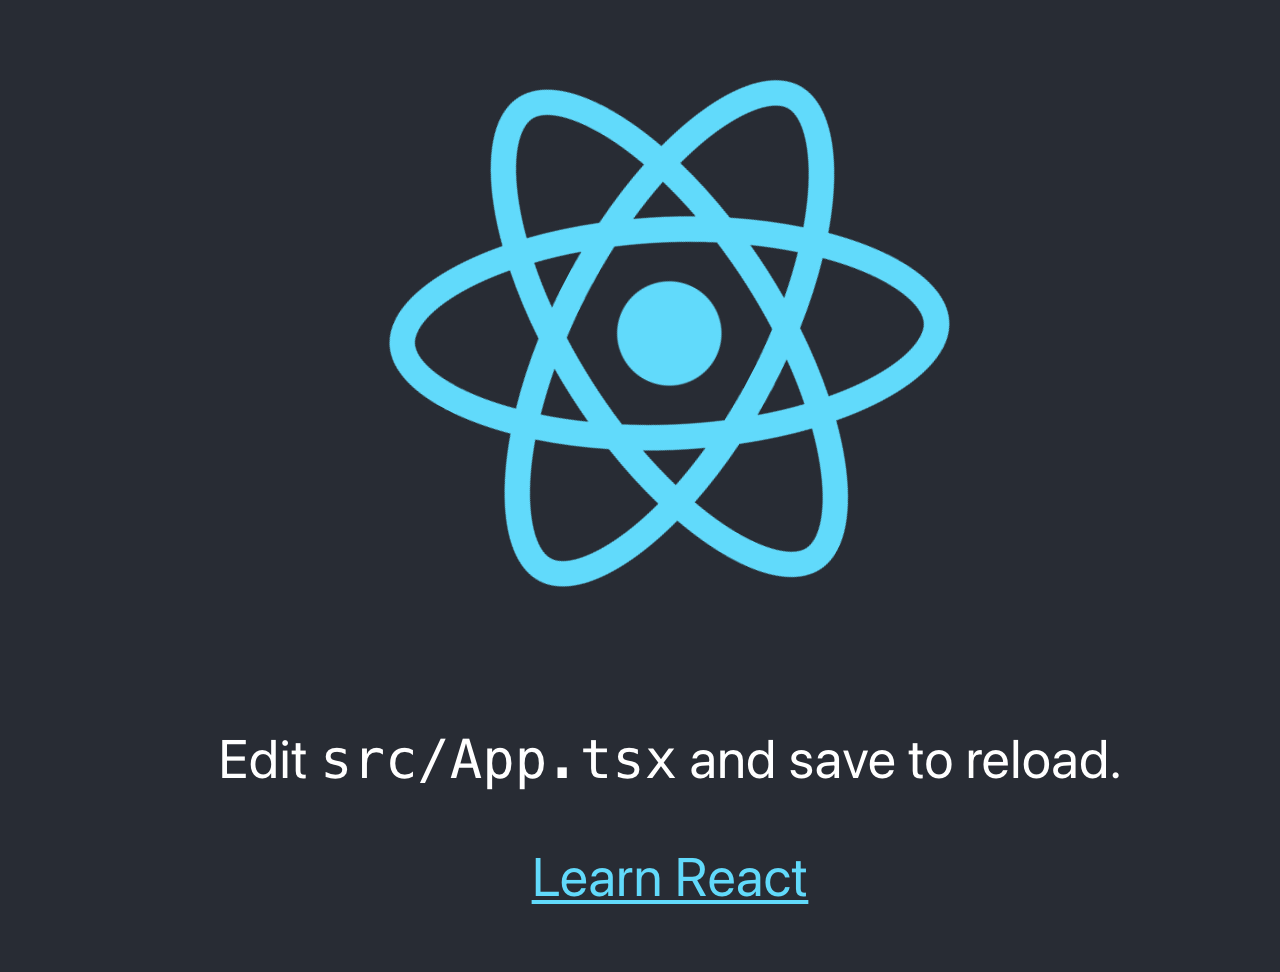
When you run the application, you'll see below page.
Build job:
When you push your changes, we would like Gitlab CI pipeline to kick-in. Below are the steps involved in build process flow

Create a file by name .gitlab-ci.yml at the root of your repository and add below code
build-react-app:
  stage: build
  image: node:16-alpine
  script:
    - npm ci
    - CI=true npm run test
    - npm run build
  artifacts:
    paths:
      - ./build
build-react-app is the name of the job
This job belongs to the build stage and we'll be having separate stage for deploy later.
Node is not available in the default 'ruby:2.5' image provided by Gitlab. We're using 'node' image based on alpine so that we can execute node and npm commands.
In the script section, we're installing packages using command npm ci . Then, we run the tests using the command CI=true npm run test and finally we're building the application using command npm run build
We want to use this build in next job deploy to deploy to AWS S3. So, we've mentioned the './build' path in artifacts section of the job. Now, the folder './build' and its contents are available for any subsequent jobs that we're going to create
Deploy job:
Deploy job is pretty simple. We just need to copy the build folder to AWS S3 bucket that we've created earlier. Below is the pictorial representation for the same.
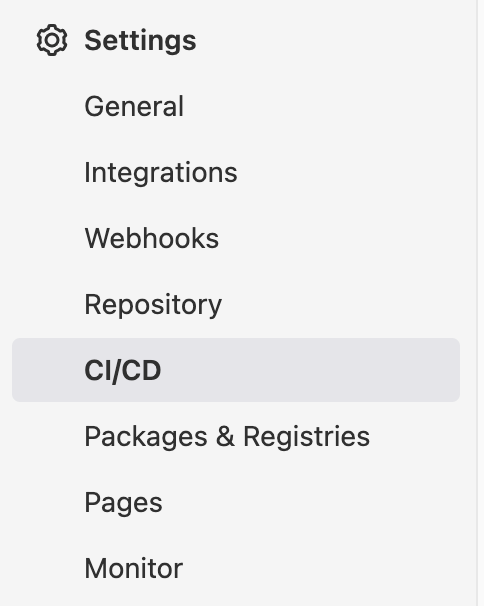
Before creating deploy job - we need to create CI CD variables in gitlab. In left hand side menu, select Settings -> CI/CD
You've to create 3 variables - AWS_ACCESS_KEY_ID representing AWS access key , AWS_SECRET_ACCESS_KEY representing secret key and AWS_DEFAULT_REGION representing AWS region. Please note that the name of these variables should be as mentioned above. This is because AWS CLI would look for these variable when trying to execute AWS CLI commands.
You can create a new IAM user and have access key and secret keys copied to the values of these variables.

Once you've created these variables, you can add deploy-react-app job in .gitlab-ci.yml as shown below
deploy-react-app:
  stage: deploy
  image:
    name: amazon/aws-cli
    entrypoint: [""]
  when: manual
  script:
    - aws s3 sync ./build/ s3://react-app-static-website-bucket
deploy-react-app is the name of the job and this job belongs to deploy stage.
Default image 'ruby:2.5' provided by Gitlab doesn't have AWS CLI installed. Hence, we're using amazon/aws-cli image which comes with AWS CLI installed.
When you see image layers of amazon/aws-cli, the entrypoint is defined as "/usr/local/bin/aws' .
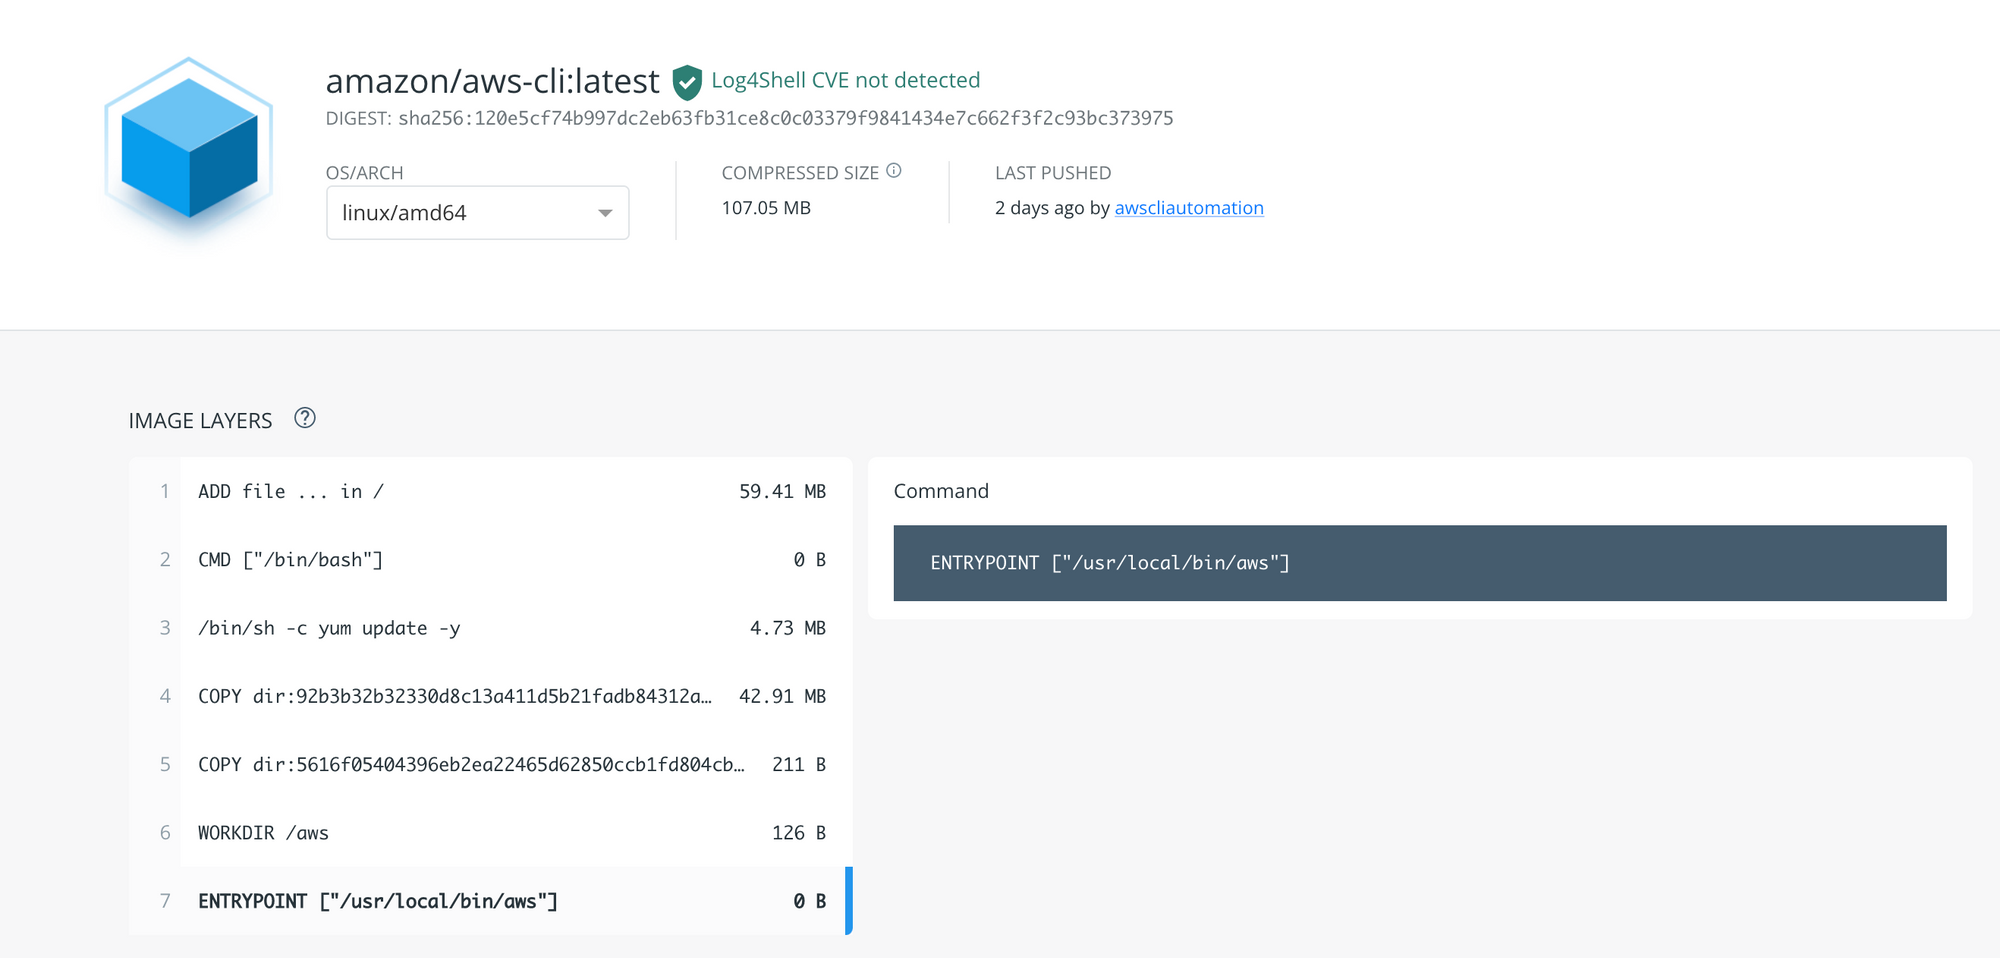
This means this endpoint executes aws command by default. You just need to pass additional parameters. For example, if you want to know the version of the CLI used in the image, you can execute below command in your terminal (assuming you've AWS CLI installed on your machine)
docker run -it amazon/aws-cli --versionPlease note that we're NOT using aws --version command and we're just using the parameter --version. This is because aws is defined as entrypoint. And, you'd be getting below output
aws-cli/2.7.11 Python/3.9.11 Linux/5.10.25-linuxkit docker/x86_64.amzn.2 prompt/offWe just want an image with AWS CLI tools installed and we want to execute AWS command manually. So, we need to override this endpoint so that we execute commands from scripts section.
We're overriding the entrypoint as "" (empty string) so that we can execute command from scripts section and it also allows us to execute multiple commands.
Manual trigger:
Depending on the environment to be deployed, this could be manual process or automatic process. Usually, in lower environments(development, staging) the deployment is done automatically. In higher environment(Production), the process in manual as we want to verify the functionality before deploying to production environment.
For the sake of this tutorial, let us assume that we want this deployment job to run manually.
Just have a when element and the value should be manual.
If you want to deploy it automatically, you can just remove when section from the job.
And, we're executing copy command to copy files from build directory to AWS S3 bucket.
Finally, we need to define stages. We want to build stage to execute first and then deploy stage has to be executed.
stages:
  - build
  - deploy
Below is the complete Gitlab CI/CD Pipeline ( .gitlab-ci.yml )
stages:
  - build
  - deploy

build-react-app:
  stage: build
  image: node:16-alpine
  script:
    - npm ci
    - CI=true npm run test
    - npm run build
  artifacts:
    paths:
      - ./build

deploy-react-app:
  stage: deploy
  image:
    name: amazon/aws-cli
    entrypoint: [""]
  when: manual
  script:
    - aws s3 sync ./build/ s3://react-app-static-website-bucket
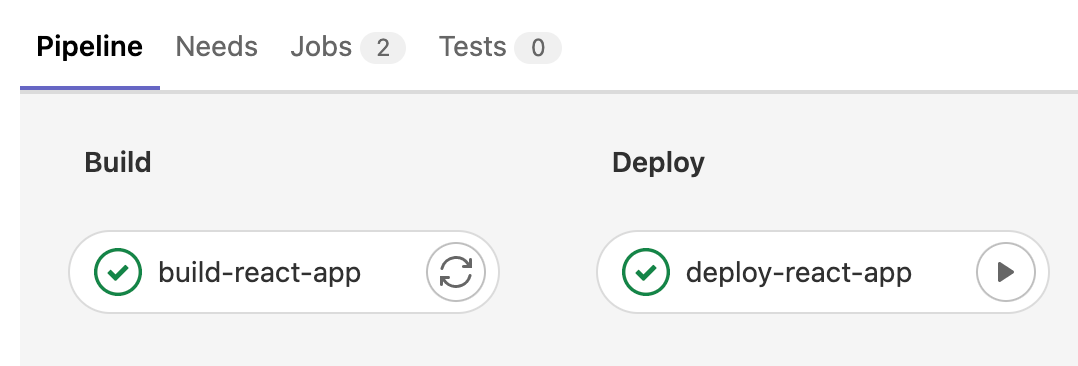
When you push this change to gitlab remote and your gitlab web console would look something like below
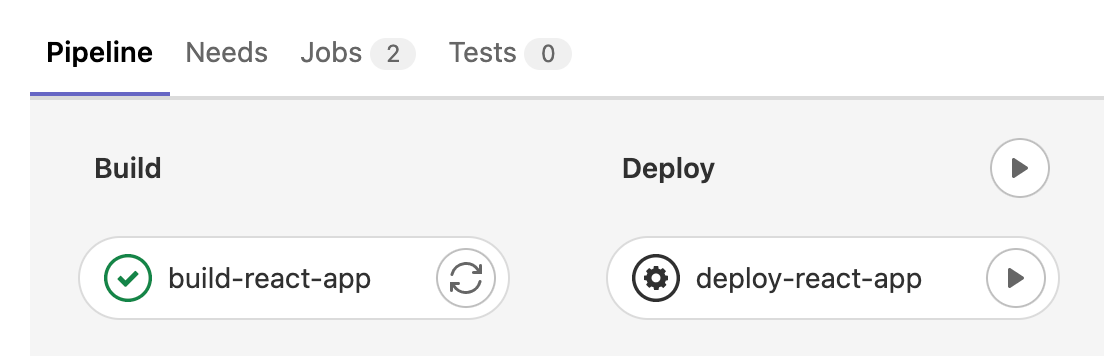
The build job is completed successfully and the deploy job is waiting to be triggered manually. When you click play button, it will be executed as shown below
And, you can check AWS S3 website url, you'll be able to see updated website.
Please let me know your thoughts in comments section.