The Beginner's Guide to CI/CD in GitLab
In this guide, you're going to learn about how to set up CI/CD pipeline using GitLab.
What is CI/CD Pipeline?
At high level, a CI/CD pipeline is nothing but a series of steps that you do to integrate your code changes to the main branch, create package and deploy the package in your destination environment. But before integrating your code, you'll be checking for linting errors, run the tests, scan for any vulnerability and so on. You'll be doing all these things as part of your CI/CD pipeline. Usually, CI/CD pipeline will kick-in as soon as you check-in your code.
GitLab Architecture:
When you check-in your code, 'Gitlab server' will recognise your changes and it will execute your CI/CD pipeline in a separate machine - referred as 'Gitlab runner' as shown in below picture. The purpose of the Gitlab server is to orchestrate the changes and manage the gitlab runners. The number of runners depend on the configuration and the jobs in your CI/CD pipeline.
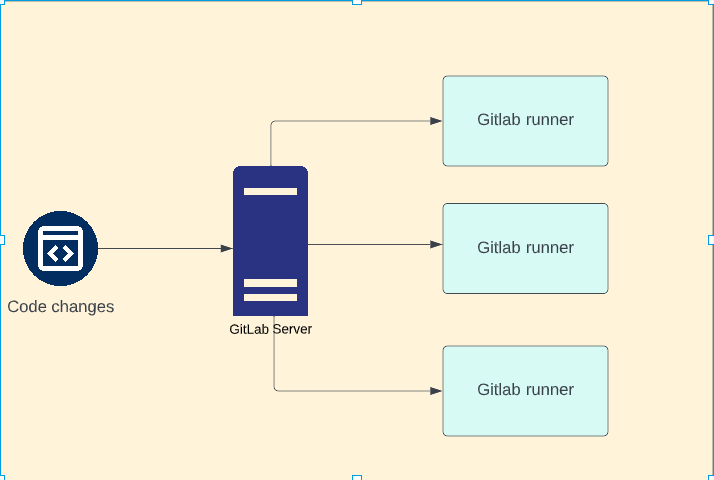
Please note that this is just a logical infrastructure just to explain the concepts - not the actual technical architecture.
Your first CI/CD Pipeline:
Let us create a simple repository in Gitlab with a readme file. Then, create a yaml file by name .gitlab-ci.yml in the same repo with the following content.
first job:
  script:
- echo "Hello world"I'll explain what it does in a second. Please note that the name of this file should be .gitlab-ci.yml and should not be anything else.
The first line represents the name of the job ( first job in this case) and then the script section in the second line tells the gitlab that the following are the statements that need to be executed as part of this pipeline. This job just contains a script with only an echo command.
As soon as you check-in the file and push the contents to remote - gitlab will start executing this pipeline as soon as it sees a file by name .gitlab-ci.yml
When you select CI/CD -> Pipelines in the left side menu of your Gitlab web console - you can see the status of the job.
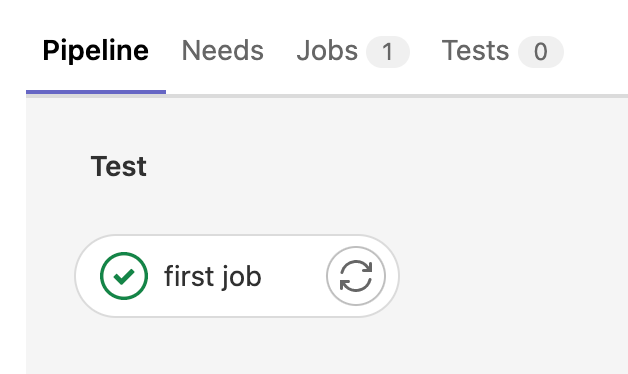
When you click Jobs tab, you can see more details about the job such as the time it took to run your pipeline, Name, status etc.. We'll discuss about the significance of Stage later.

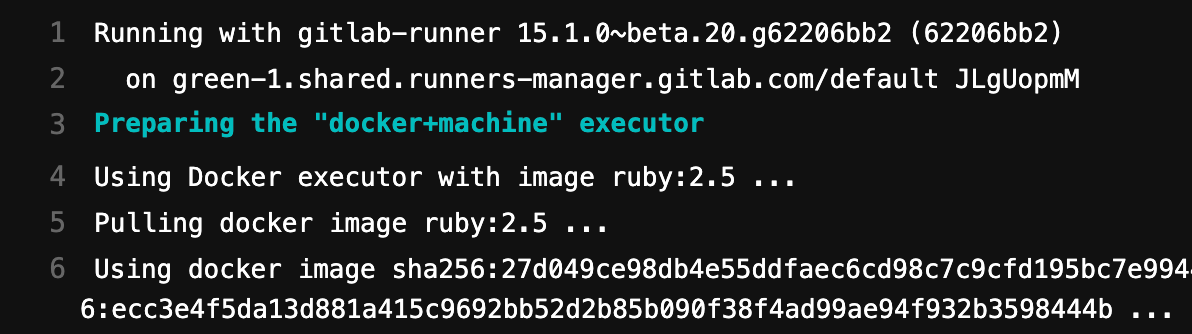
When you click on the green passed badge - you can see the logs of the last execution.
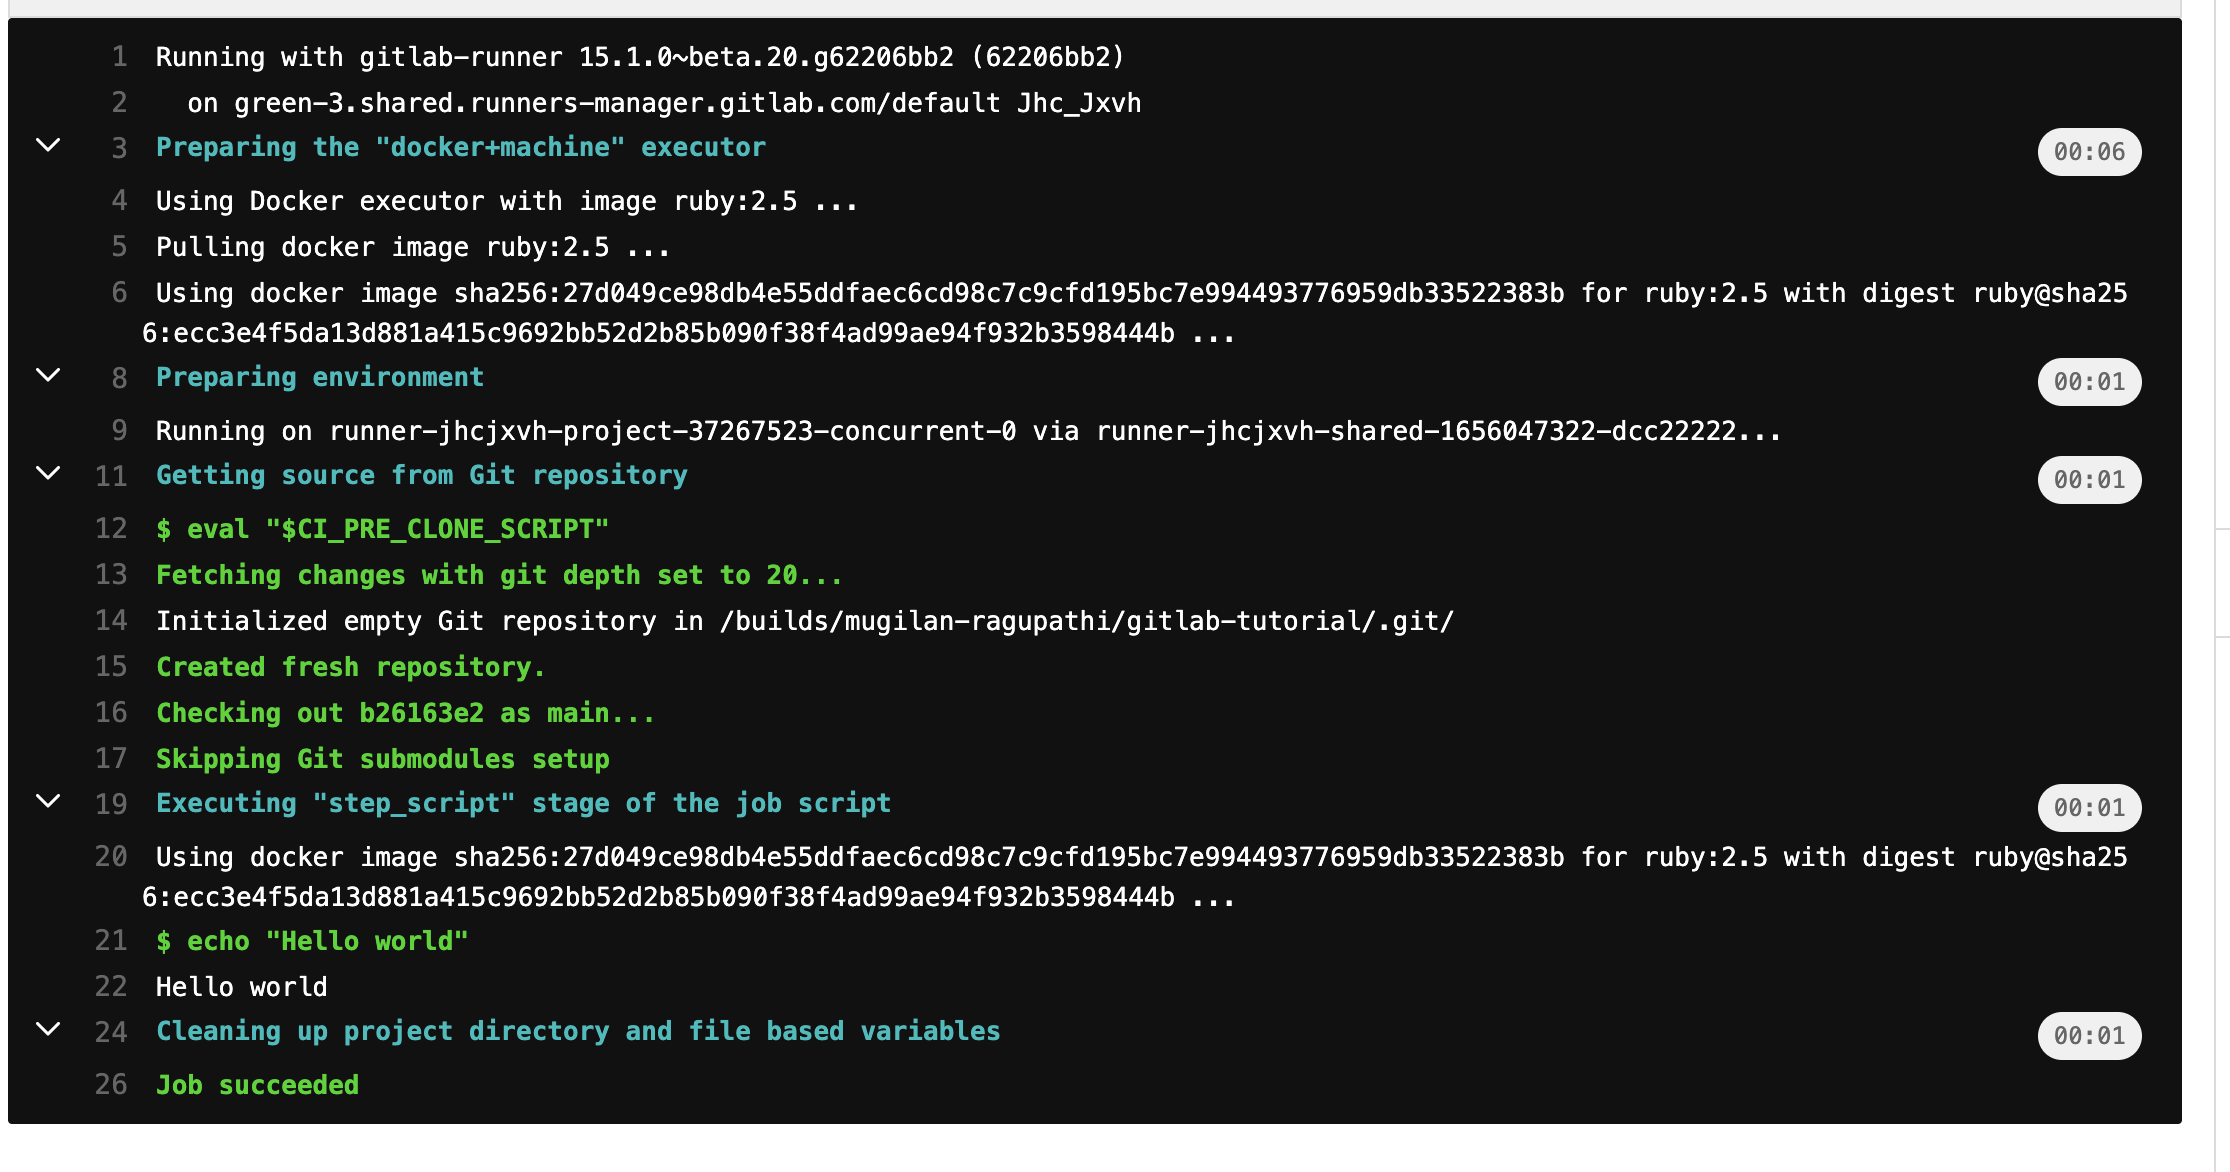
At the first line of the above log, you can see that the CI/CD pipeline is executed in gitlab-runner . At line 5, you can see that it uses the default docker image ruby:2.5 to execute your pipeline. At line 22, it prints "Hello World".
Updating your pipeline:
Let us update the pipeline that we created earlier.
Instead of a single job, I've created 2 jobs - install package and run test These jobs simulate 'installation of packages' and 'running the test'.
install packages:
  script:
    - echo "simulating installing packages"

run test:
  script:
    - echo "simulating running tests"
When you commit and push these changes, Gitlab will execute CI/CD pipeline as shown below
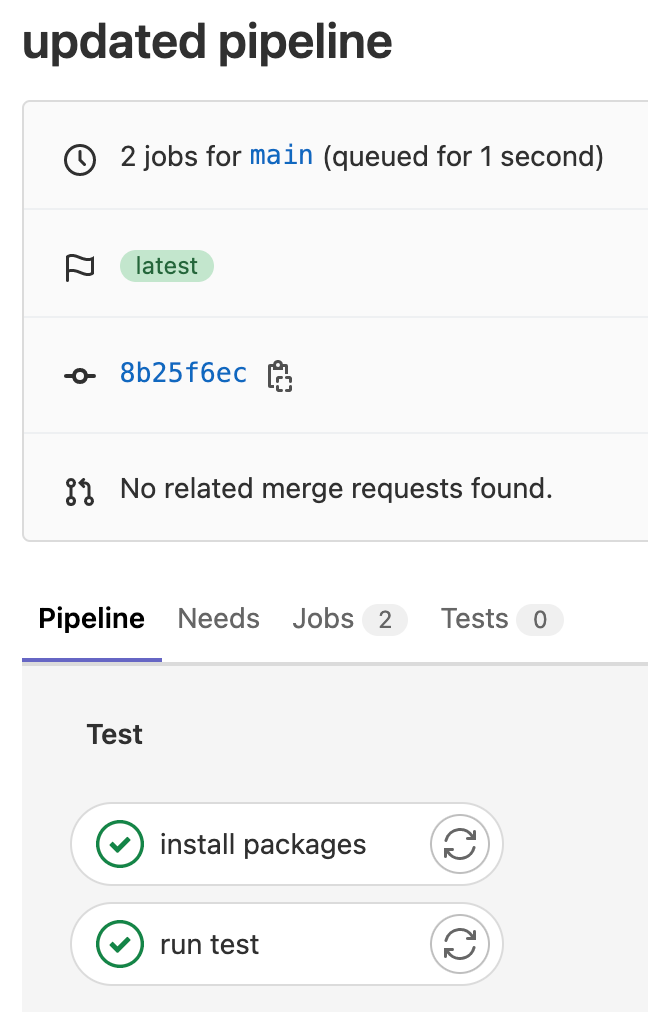
Important thing to note here is that these jobs run in parallel - as shown in above picture. As scripts used in these jobs are just echo statements, we didn't face any issues. Had it been with actual CI/CD pipeline - the job run test would have failed as without installing the packages we will not be able to run tests.
So, we want to tell Gitlab CI/CD the sequence in which the jobs have to executed. Stages is where the sequence is mentioned and each of the job has a stage. Below is the updated pipeline where the changes are highlighted in bold.
stages:
  - install
  - test


install packages:
  stage: install
  script:
    - echo "simulating installing packages"

run test:
  stage: test
  script:
    - echo "simulating running tests"
When you push these changes, you can see that the jobs run in sequence
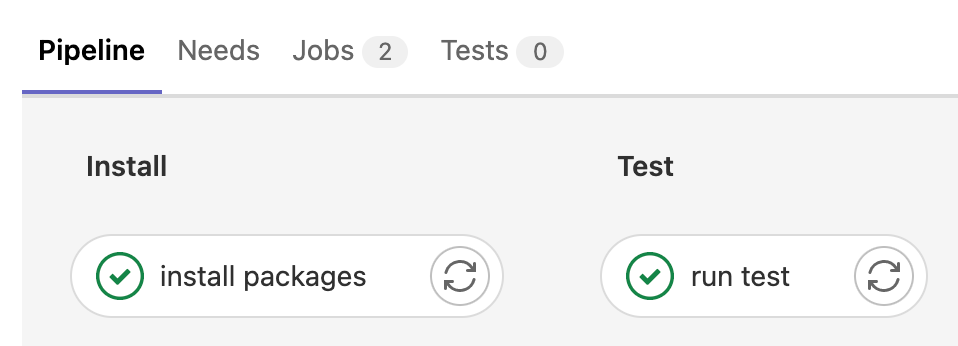
Even though these jobs run in sequence, there is no relationship between these jobs. Each job runs in its own isolated environment.
Choosing the docker image in Gitlab runner:
As mentioned earlier, the default image used by Gitlab runner is ruby:2.5 as shown in below screenshot( see line no 4)
You might want to execute different docker image based on your needs. For example, if you're building nodejs application - you might want to use a docker image where nodejs is already available.
In the job, you can mention the base docker image using image as shown in code snippet below.
install packages:
  image: node:16-alpine
  stage: install
  script:
    - node --version
    - echo "simulating installing packages"
The surrounding yaml code is omitted for brevity. When you push the changes, you can see gitlab runner is using node:16-alpine image and it prints version correctly at line 22.
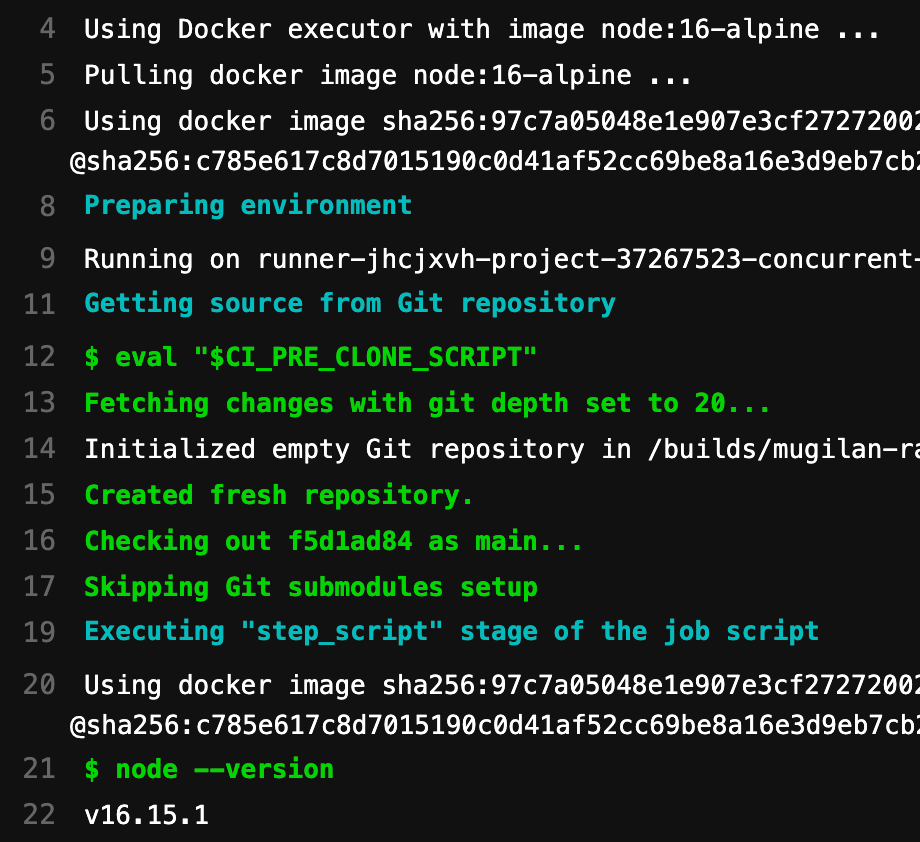
It is important to note that we've mentioned the node docker image only in the job install packages. The other job in the pipeline will use default ruby docker image.
If you want to use all the jobs in your pipeline to use the same image - you can move image to top level as shown below
stages:
  - install
  - test

image: node:16-alpine

install packages:
  stage: install
  script:
    - node --version
    - echo "simulating installing packages"

run test:
  stage: test
  script:
    - echo "simulating running tests"
Now, all jobs will use the same image node-16-alpine
Sharing files between jobs:
Consider a scenario where one job builds the application and creates a package. And, another job wants to deploy that package to target environment. As mentioned earlier, there is no relationship between the jobs even though they belong to the same CI/CD pipeline.
If we want to use the data between jobs, you can use artifacts. Artifacts, as the name implies, are files generated as part of executing a job. These files are available for other jobs.
Consider below code snippet - where I've 2 jobs - build package and deploy package. The job build package generates a file 'build.txt' inside 'package' directory and we're declaring the path package as artifacts. This means any files inside this package directory and will be available for other jobs.
stages:
  - build
  - deploy

image: node:16-alpine

build package:
  stage: build
  script:
    - mkdir package
    - cd package
    - echo "creating package" >> build.txt
  artifacts:
    paths:
      - package

deploy package:
  stage: deploy
  script:
    - echo "deploying package"
    - cat package/build.txt
In the deploy package job - we're printing contents of the file build.txt . We're able to achieve this as 'package' directory along with its contents are uploaded as artifacts.